
Radius Authentication on Junos
Initial Setup
Only have to do this once on each Windows domain controller
On the domain controller – start Server Manager
Under Manage – Add roles and features – find and add Network Policy and Access Services
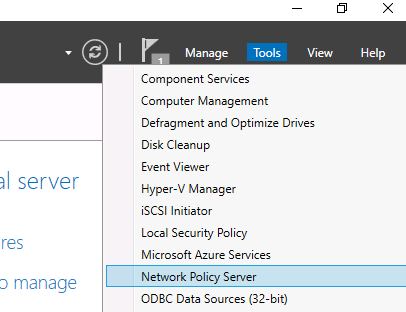
After Network Policy Services (NPS) has completed installing, go back to Server Manager – under Tools select Network Policy Server
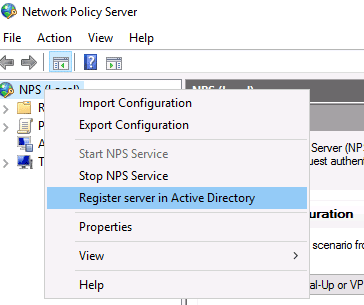
Find the root labeled “NPS (Local)” and right-click on it. Choose “Register server in Active Directory”.
Select OK in the confirmation dialogue box that pops up.
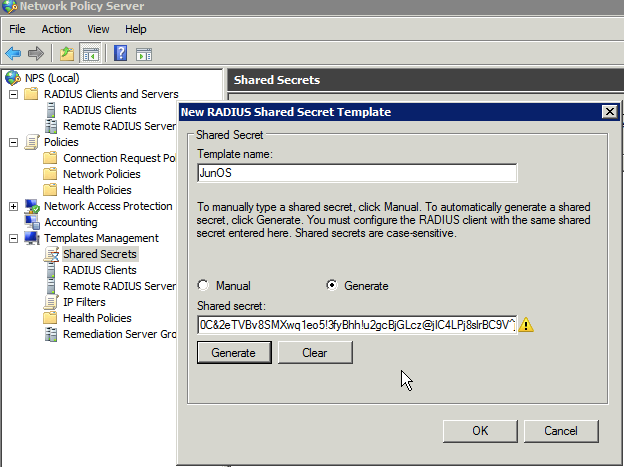
Select “Templates Management”, right-click “Shared Secrets” and select “New”.
Give the template a name like “JunOS”, select “Generate” and then click the “Generate” button to create the shared secret.
Copy the shared secret to a text file for later use, then click OK
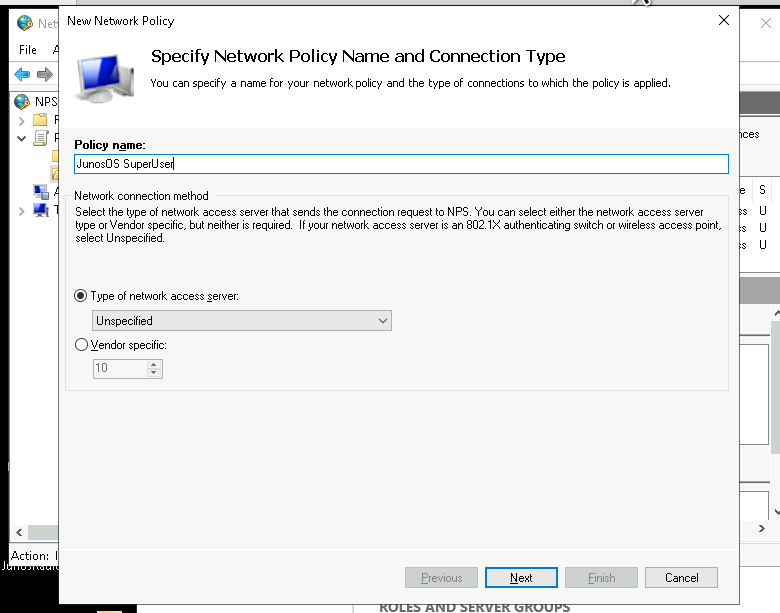
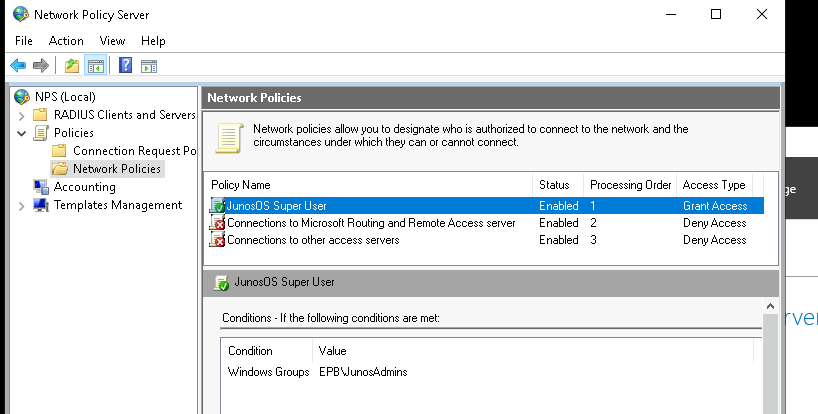
5. Click “Policies”, right-click on “Network Policies” and choose “New”
6. Choose a name for the SuperUser policy like “JunOS SuperUser”
7. The type of network access server should be “Unspecified”
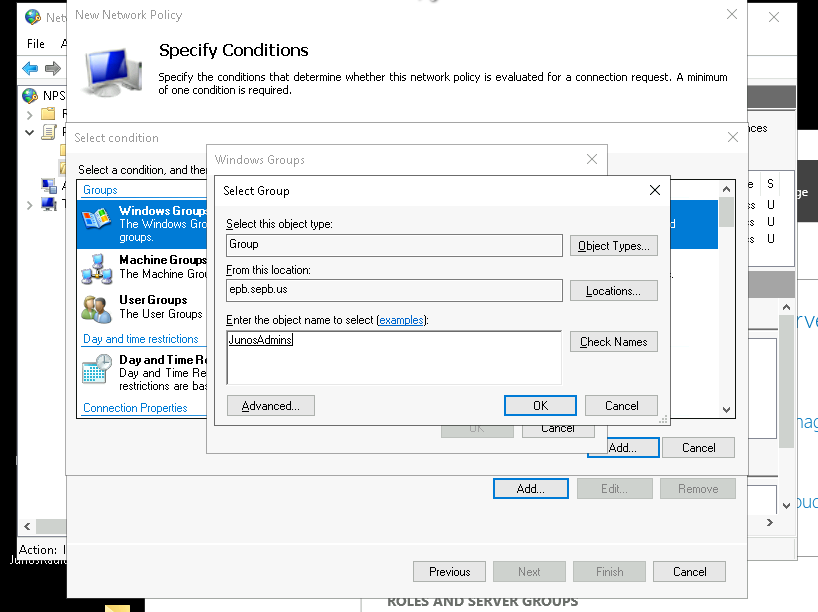
8. Add a new “Condition” matching “Windows Groups” and add the groups from AD that should have SuperUser access. I had created a group named “Junos Admins” already in AD
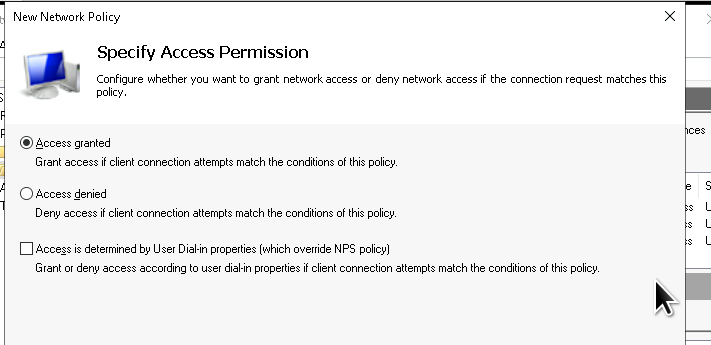
9. On the “Specify Access Permission” page leave “Access granted” selected
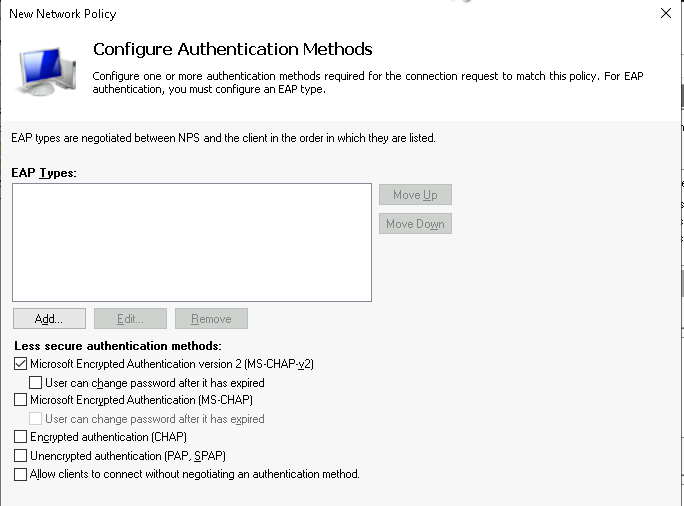
10. On the “Configure Authentication Methods” page unselect everything except “Microsoft Encrpyted Authentication version 2 (MS-CHAP-v2)
11. On the “Configure Constraints” page there are no changes.
12. On the “Configure Settings” page delete the “Standard” RADIUS attributes
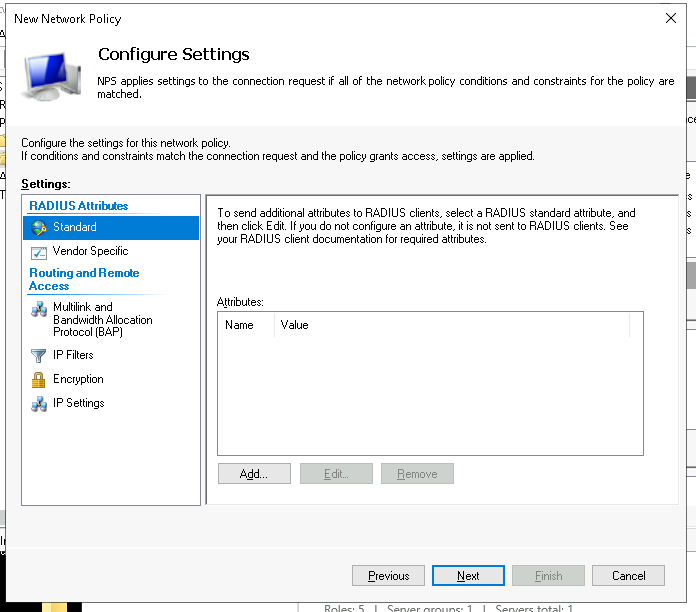
13. Select “Vendor Specific” under the RADIUS Attributes
14. Click Add, change the Vendor dropdown to “Custom” and click “Vendor-Specific” from the attributes
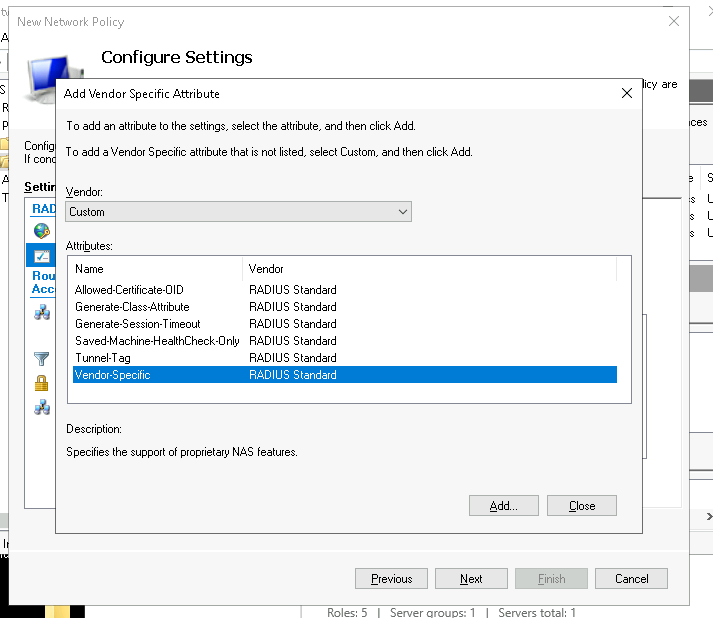
15. Click “Add”, then “Add” on the “Attribute Information” dialog
16. Select “Enter Vendor Code” from the “Specify network access server vendor” section and enter the Juniper vendor code “2636”
17. Select “Yes. It conforms” to specify that the attribute conforms to the RADIUS RFC
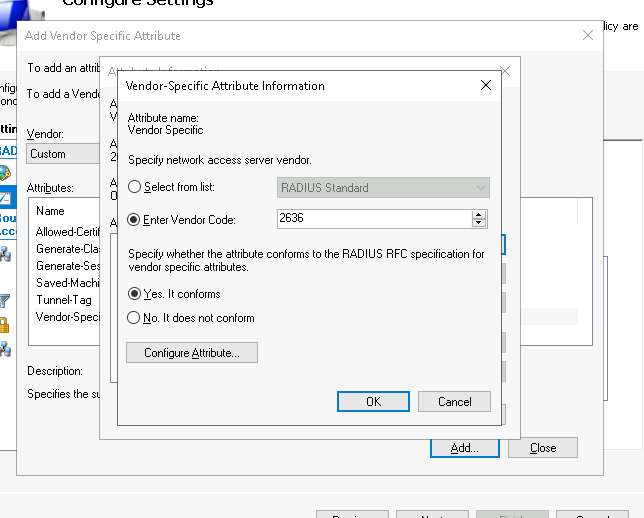
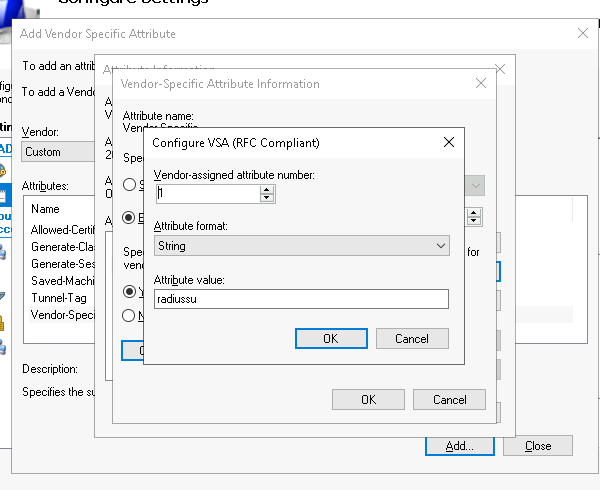
18. Click “Configure Attribute” and set the “Vendor-assigned attribute number” to “1”, which represents “Juniper-Local-User-Name”
19. Set the “Attribute format” to “String”
20. Set the “Attribute value” to “radiussu”. This is the local username passed to JunOS
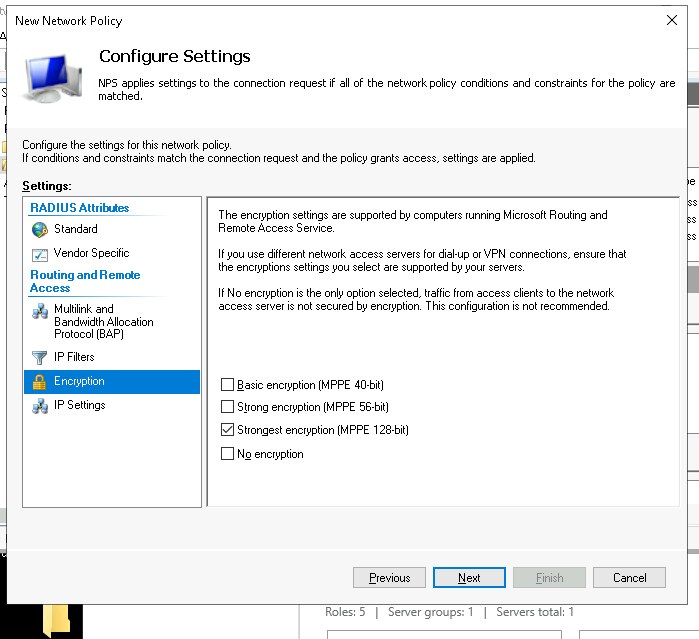
21. Click OK buttons to get back to the “Configure Settings” screen, and select “Encryption”
22. Unselect everything except “Strongest Encryption”
25. Make sure the order of the Policies is as in the next screenshot
Windows Firewall Configuration
Permit UDP port 1812 inbound
Setting up a new switch
26. Expand “RADIUS Clients and Servers”, right-click “RADIUS Clients” and click “New”
27. Enter the details of the JunOS router, selecting “JunOS” from the Shared Secrets template dropdown
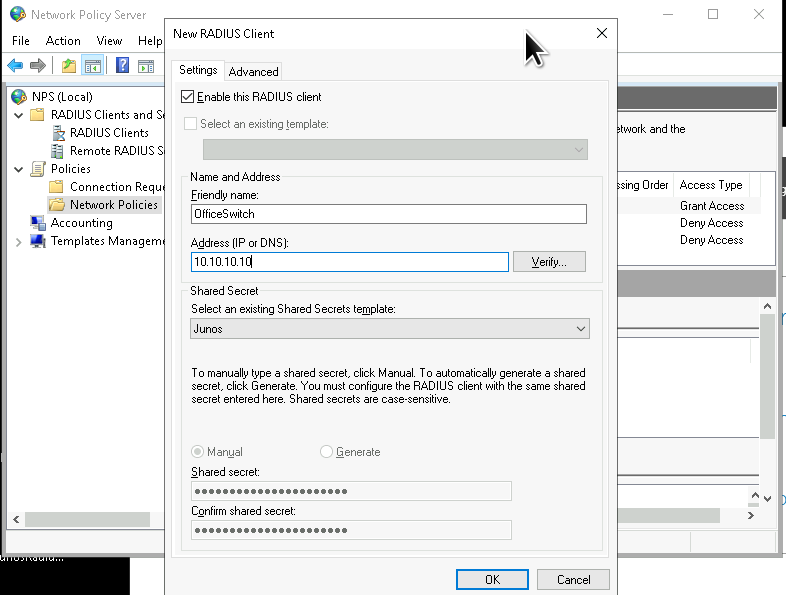
28. Click “OK”
The JunOS bit (router IP address 10.233.0.42), add this configuration changing the secret key that Windows created. This sets a user ‘role’ – ‘radiussu’ and configures the radius server shared secret. We also will be logging activity by that user
# I am calling the radius user radiussu
set system login user radiussu class super-user
set system services ssh
set system services ssh protocol-version v2
set system authentication-order [ password radius ]
set system radius-server 172.18.0.34 secret "$9$xYa-VYji.5QnJG69ApEhwYgaGif5F69pP5revWdVP5Tz6A1RSKv8s2Uikqf5p0BIRS"
set system radius-server 172.18.0.35 secret "$9$xYa-VYji.5QnJG69ApEhwYgaGif5F69pP5revWdVP5Tz6A1RSKv8s2Uikqf5p0BIRS"
set system radius-options password-protocol mschap-v2
# some extra logging we need to add
set system syslog host 98.159.192.25 authorization info
set system syslog host 98.159.192.25 daemon any
set system syslog host 98.159.192.25 conflict-log any
set system syslog host 98.159.192.25 change-log any
set system syslog host 98.159.192.25 interactive-commands any
set system syslog host 98.159.192.25 match ifOperStatus
set system syslog host 98.159.192.25 facility-override local6
commit check
commit confirm